Learn how to create a Report from a Doc Set and select, edit, and order the items you want into a tabular format.
After adding your documents and creating Doc Sets, you can start exploring other capabilities of Docugami. In this article, we will explore a common task: Extracting Information from a set of documents in a Tabular Report. All projects are based on a single doc set, which is a set of similar documents, like leases, NDAs, service contracts, menus, or prenuptial agreements.
CREATE YOUR REPORT:
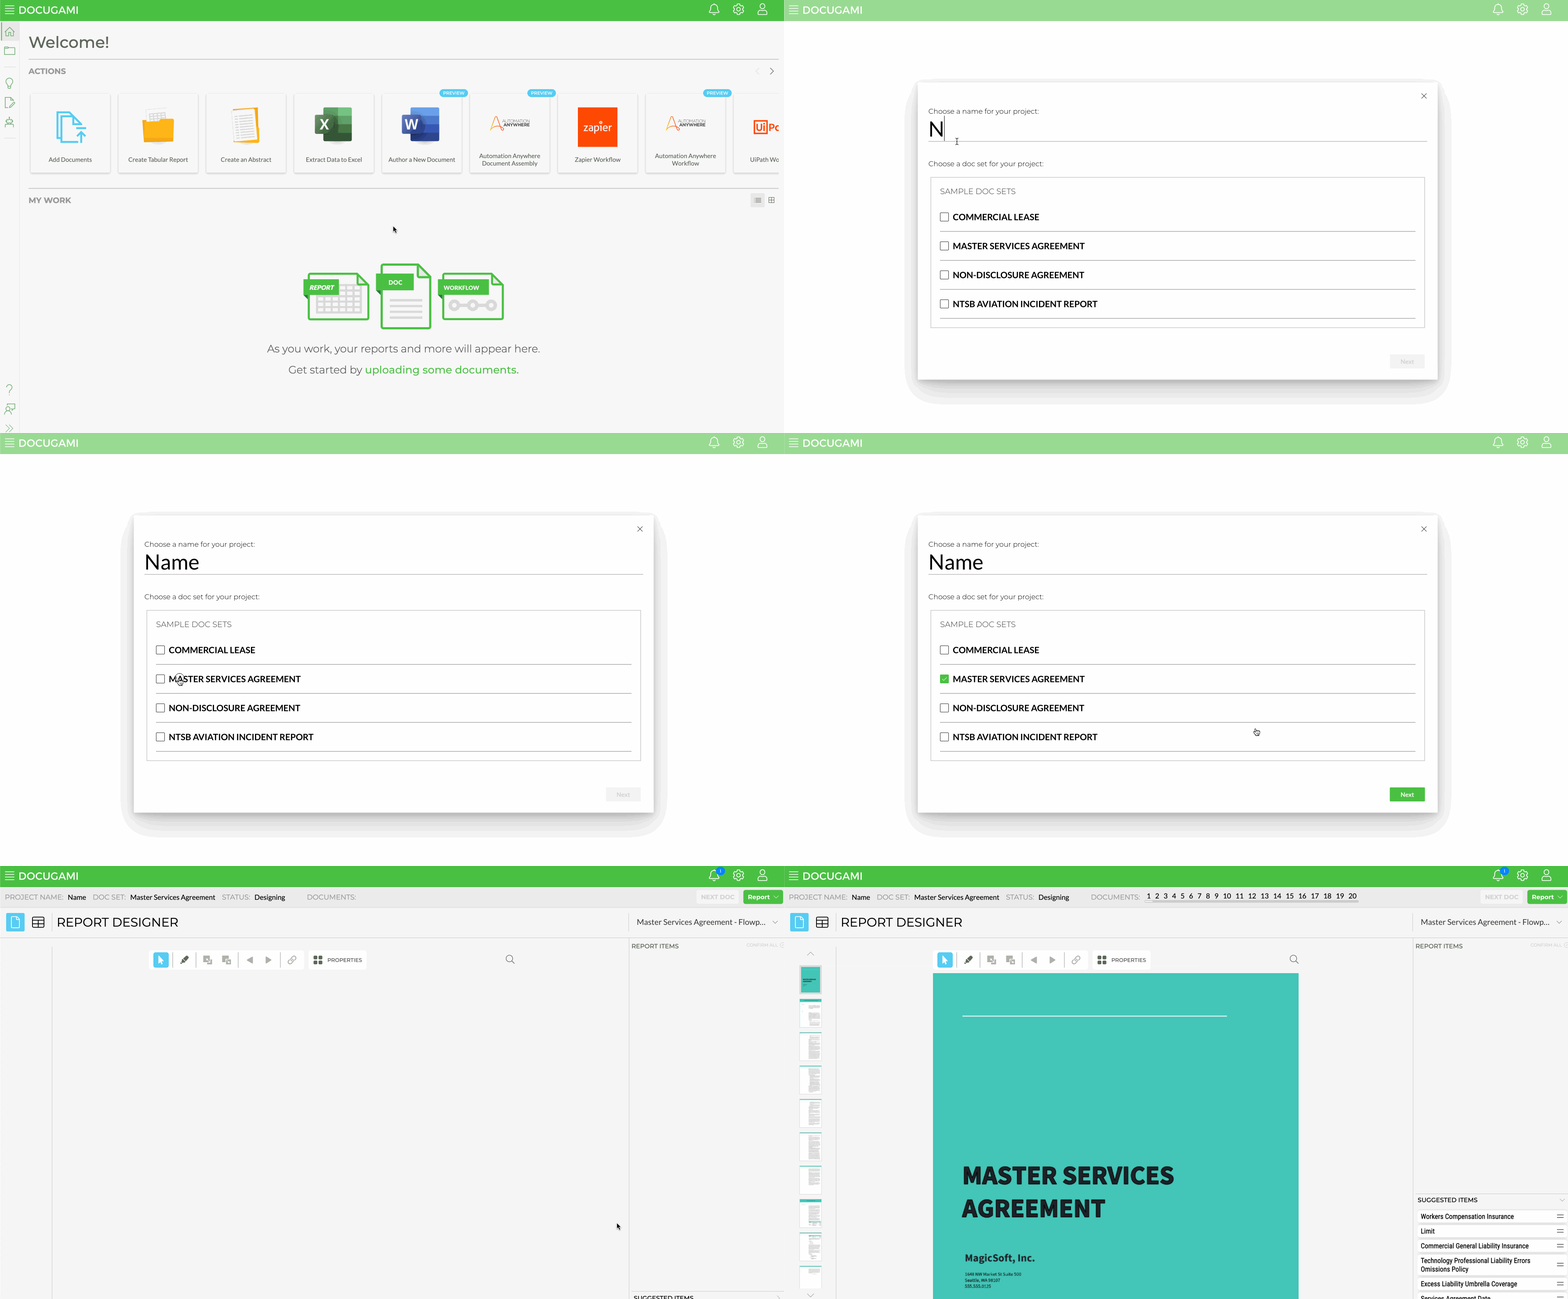
From the Home Page or the Understand Docs tab select Generate Tabular Report.Name your report, select a Doc Set, and click Next to get started.
This will open the first of up to 20 documents in your doc set. To start building your report, scan the document and as you hover over various chunks of information they will be highlighted in blue.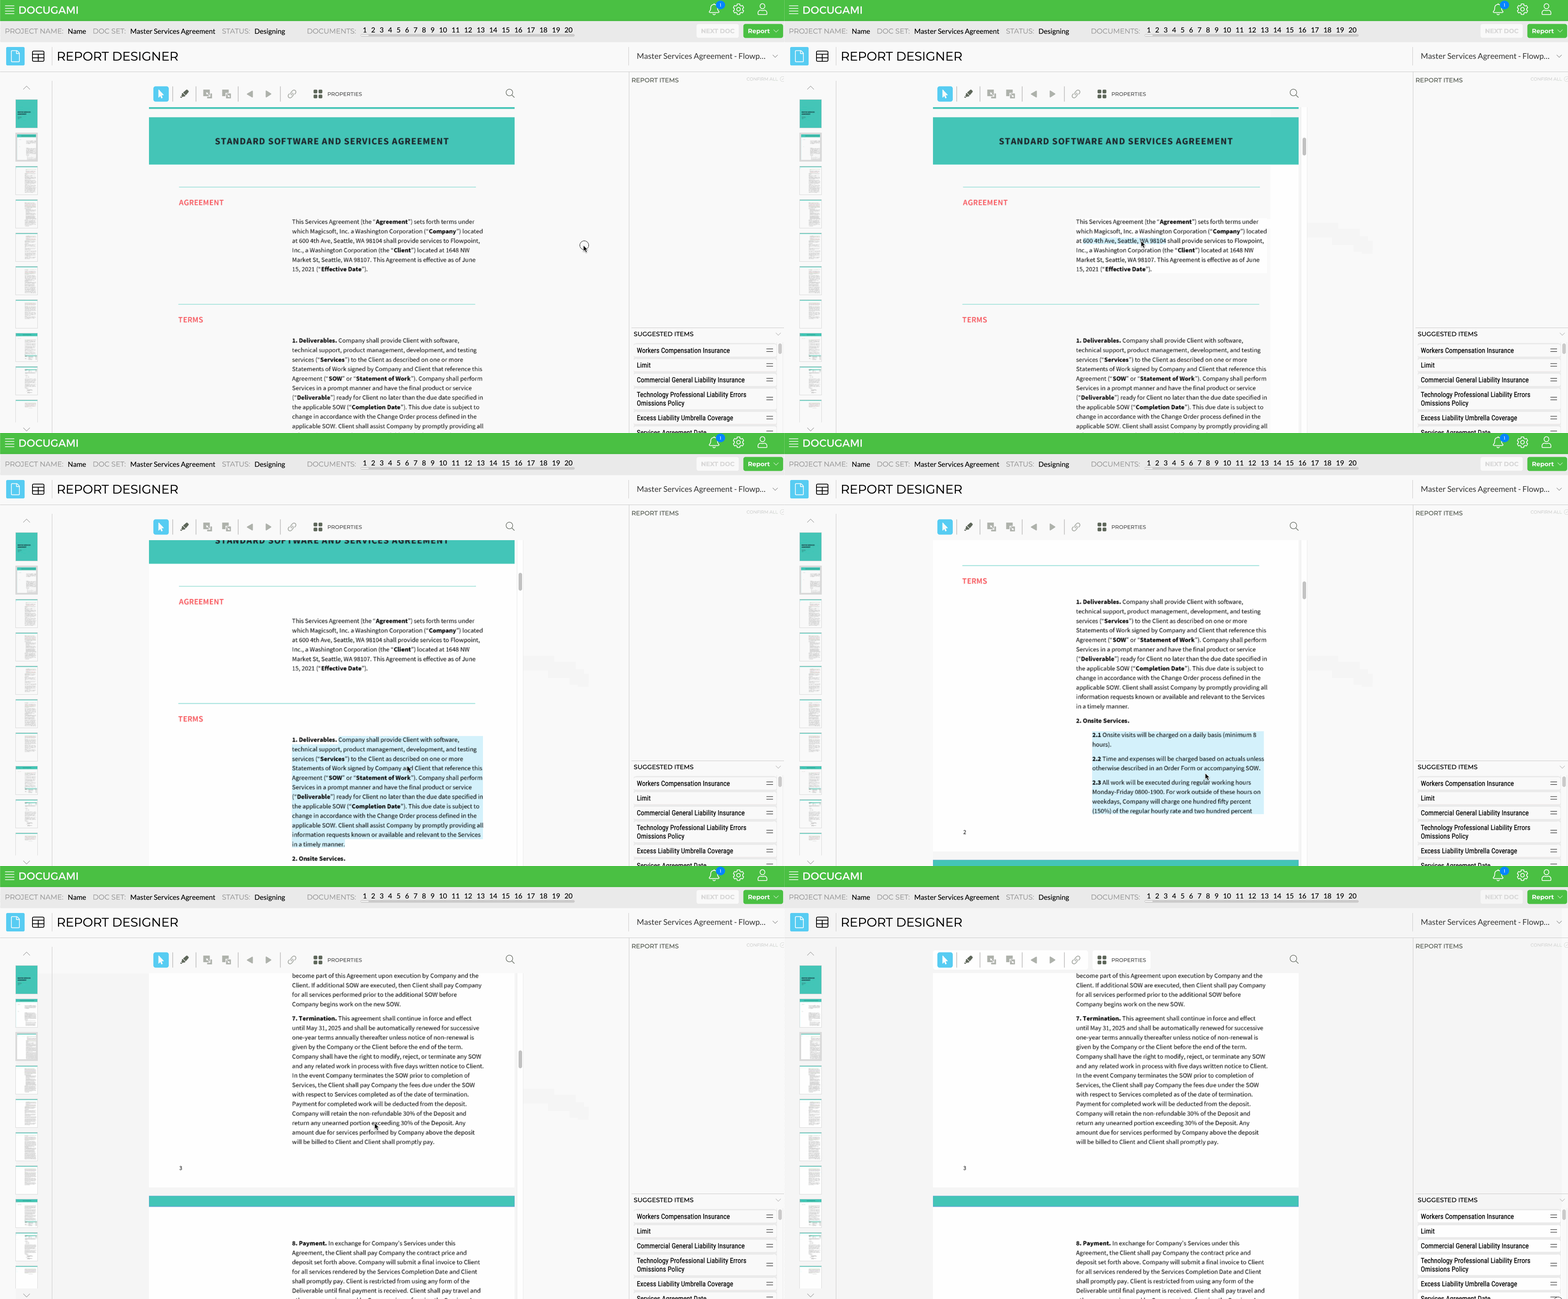
DESIGN YOUR REPORT:
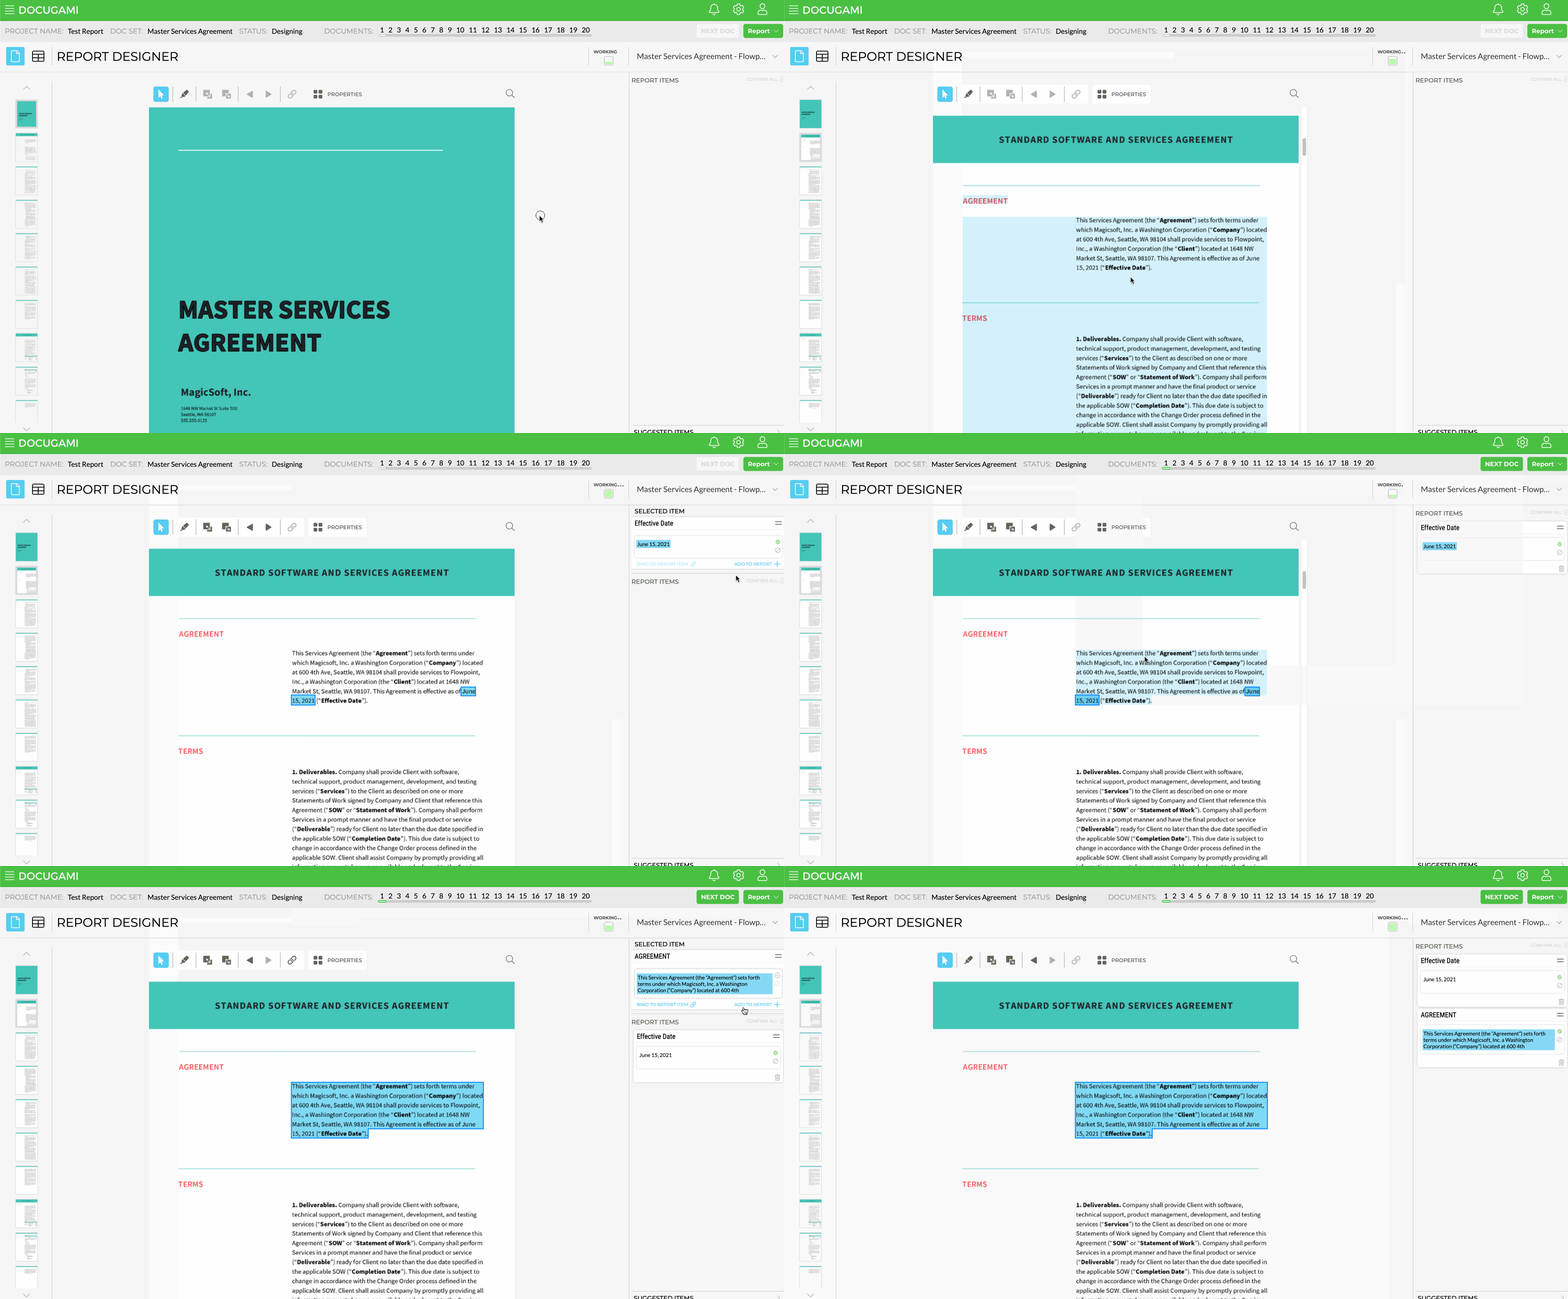
To design your report, select those chunks that interest you and they will appear in the right-hand column as a card with a Tag (the name of the chunk type) and their Content (the first several words of the chunk) along with some actionable buttons.
There are three ways to add an item to the report:
- When selected you can click the Add to Report button at the bottom of the card which will add the item to the topmost position of the list.
- You can select the Drag Handle (the two horizontal bars in the top left of the card) and drag the card into the list which allows you to drop it into whatever position you like in the list (if there are other items in it).
- Alternatively, you can grab the chunk itself in the document and drag it into whatever position you like in the list (if there are other items in it).
NAVIGATING CHUNKS:
Since chunks come in all sizes and varieties we've provided a number of tools to help you choose the exact chunk you want, regardless of size or position:
- Hover - as you hover various chunks will light up in blue. If only part of the chunk that you want lights up you can hover near the edges of it, particularly any that are being missed from the selection you want, and if Docugami recognizes a larger chunk it will highlight the rest of it. An example of this would be a clause in a list in which you might only want the clause content itself, you might want the title/name of the clause or even the letter or number in the list.
- Double Click - Sometimes there might be a smaller chunk within a larger chunk that you wish to select, for example, an address in which you only want the zip code. To select a chunk within a larger chunk simply double click it. This works for several layers of chunks within chunks.
- Previous/Next - At the top of the document pane we've provided a number of tools. The right and left arrow tools allow you to move to either the previous or next chunk from the one you already have selected. This can be helpful on large chunks where you don't want to scroll to grab the next chunk.
- Grow/Shrink Selection - when you have something selected that is within a larger chunk, the grow button will select that larger chunk. If there is a chunk within the chunk you have selected, the shrink button will select the first chunk within it.
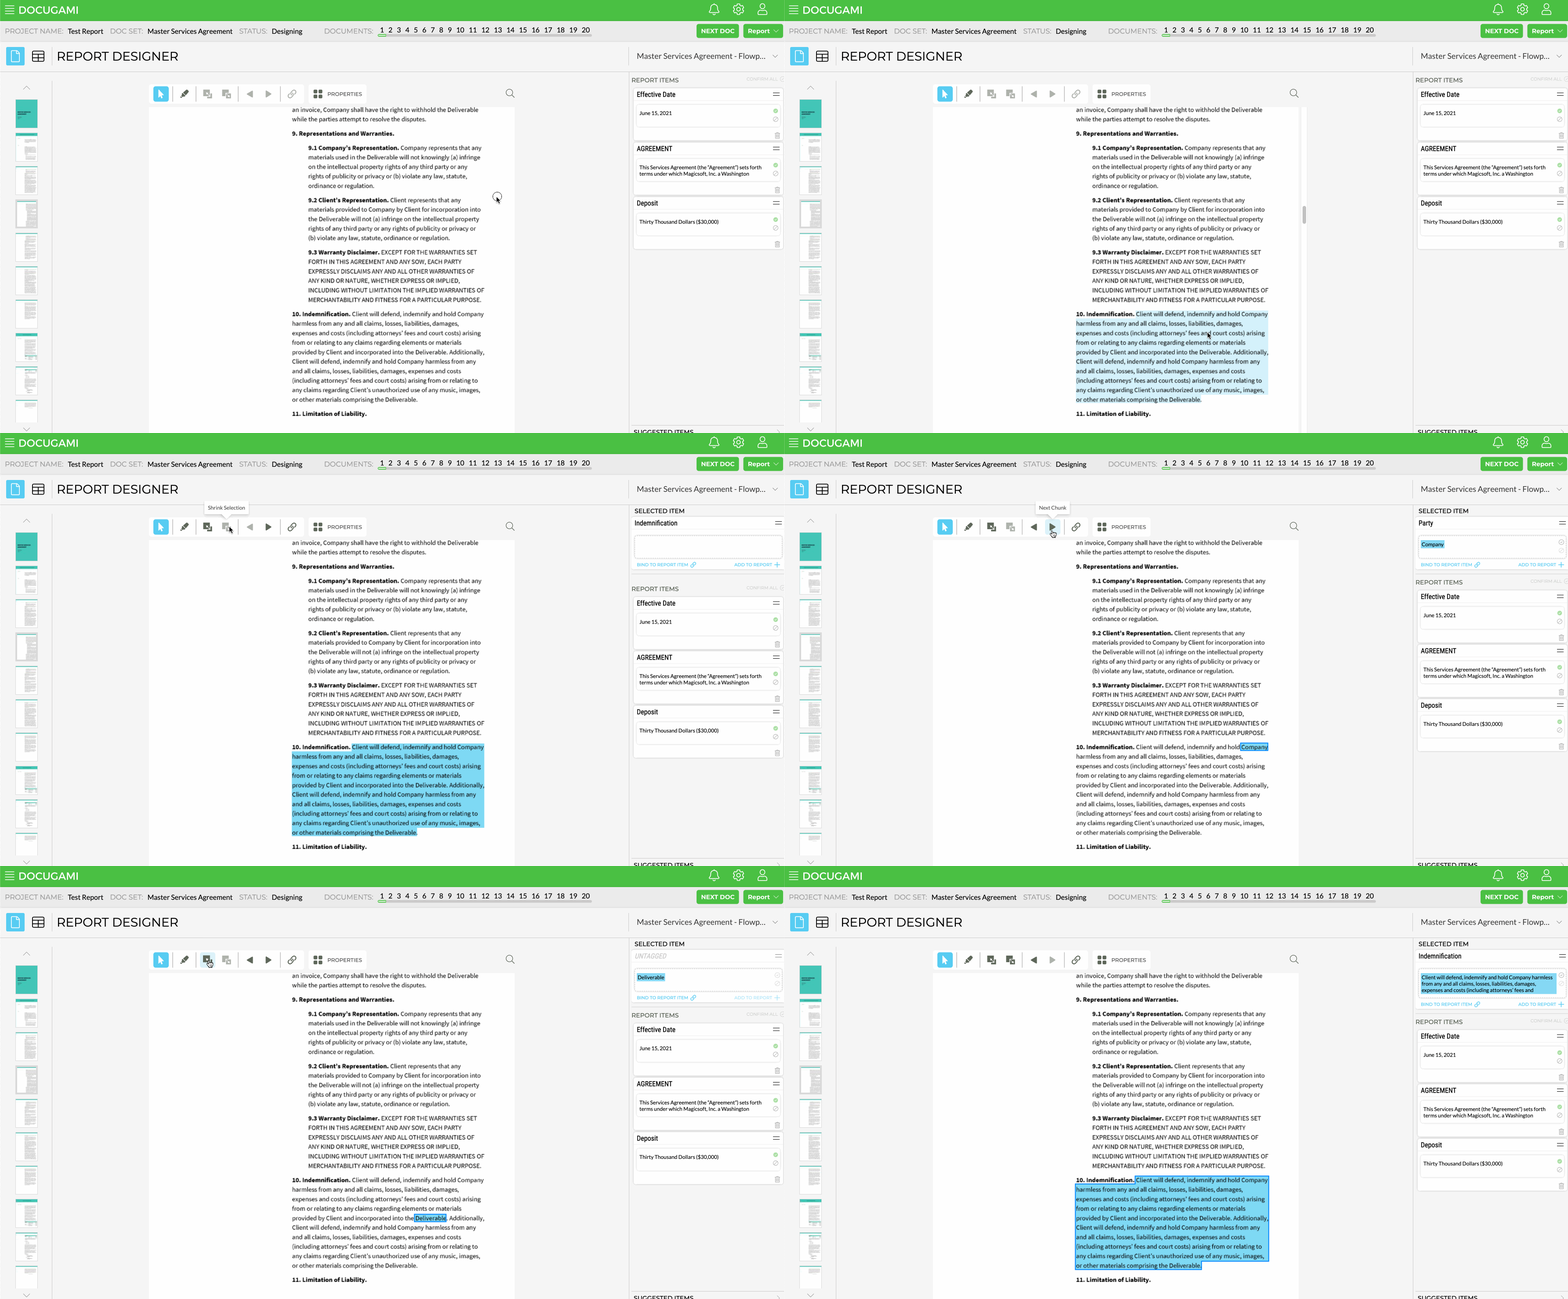
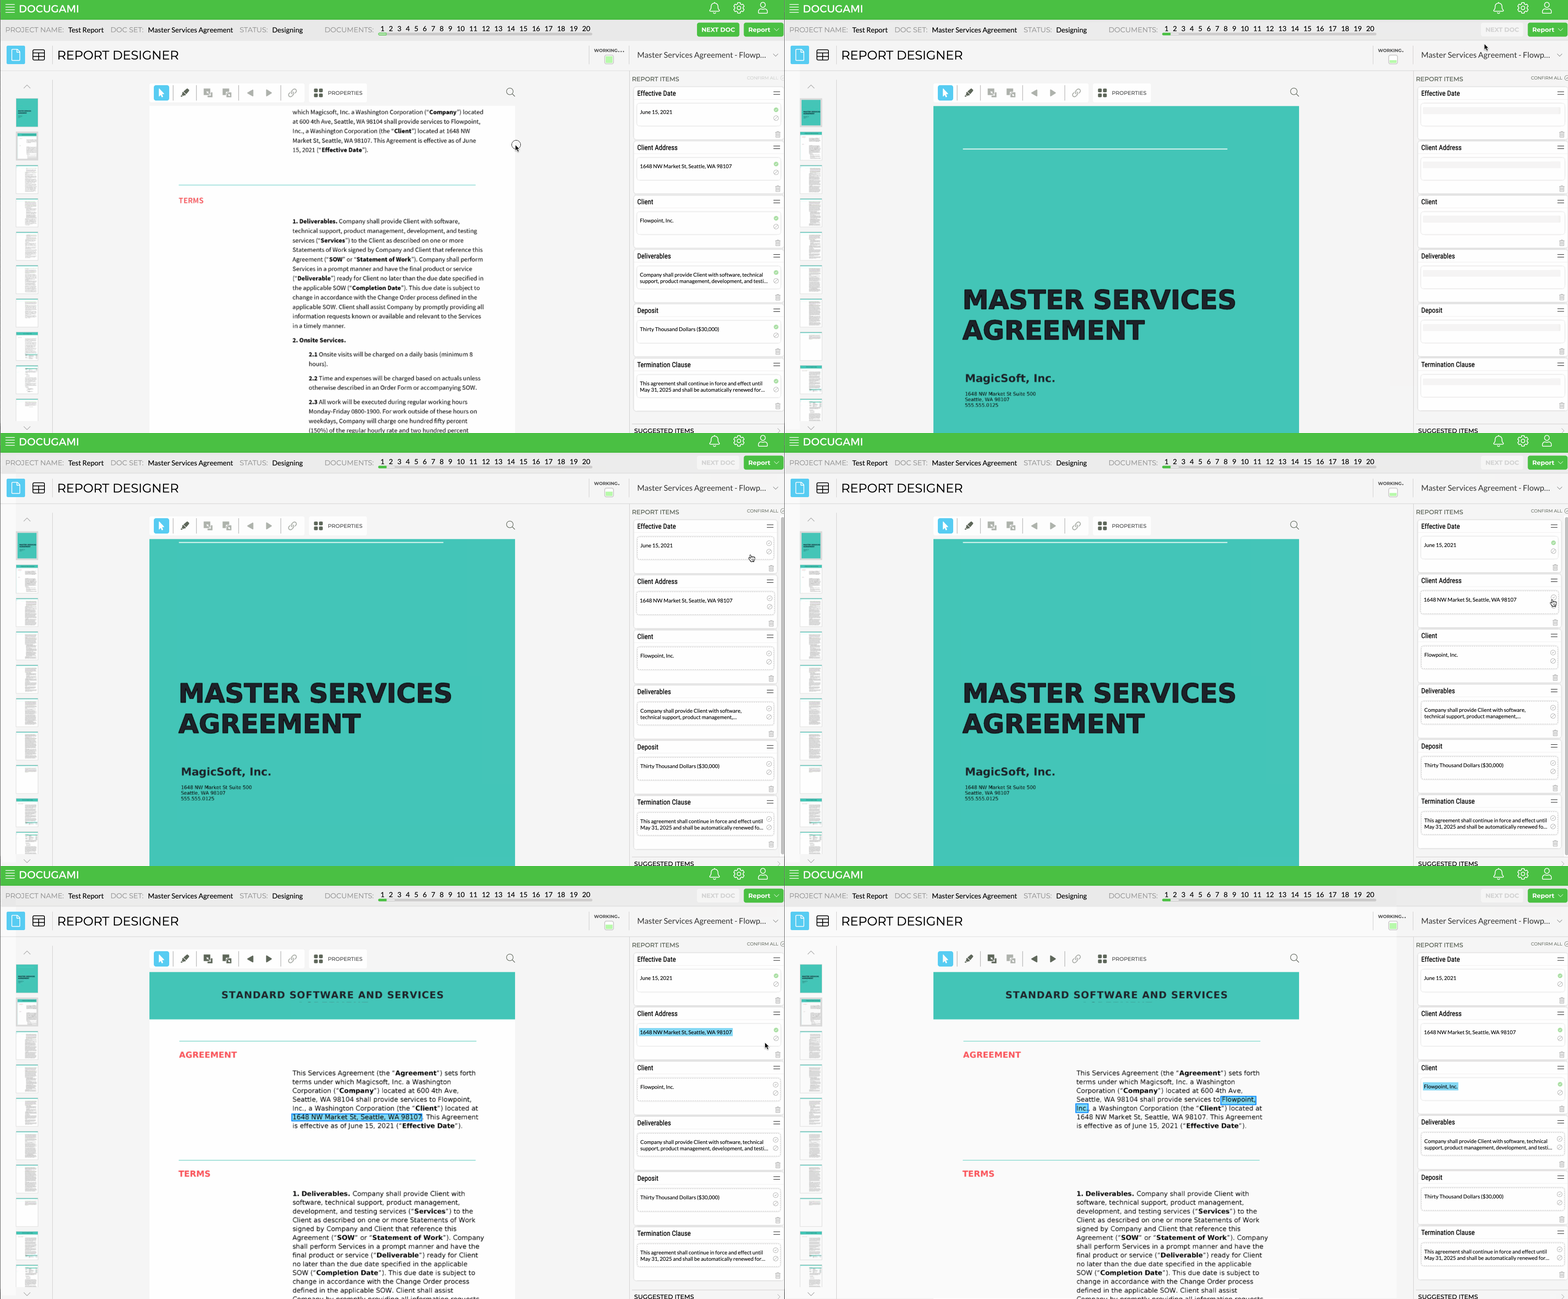
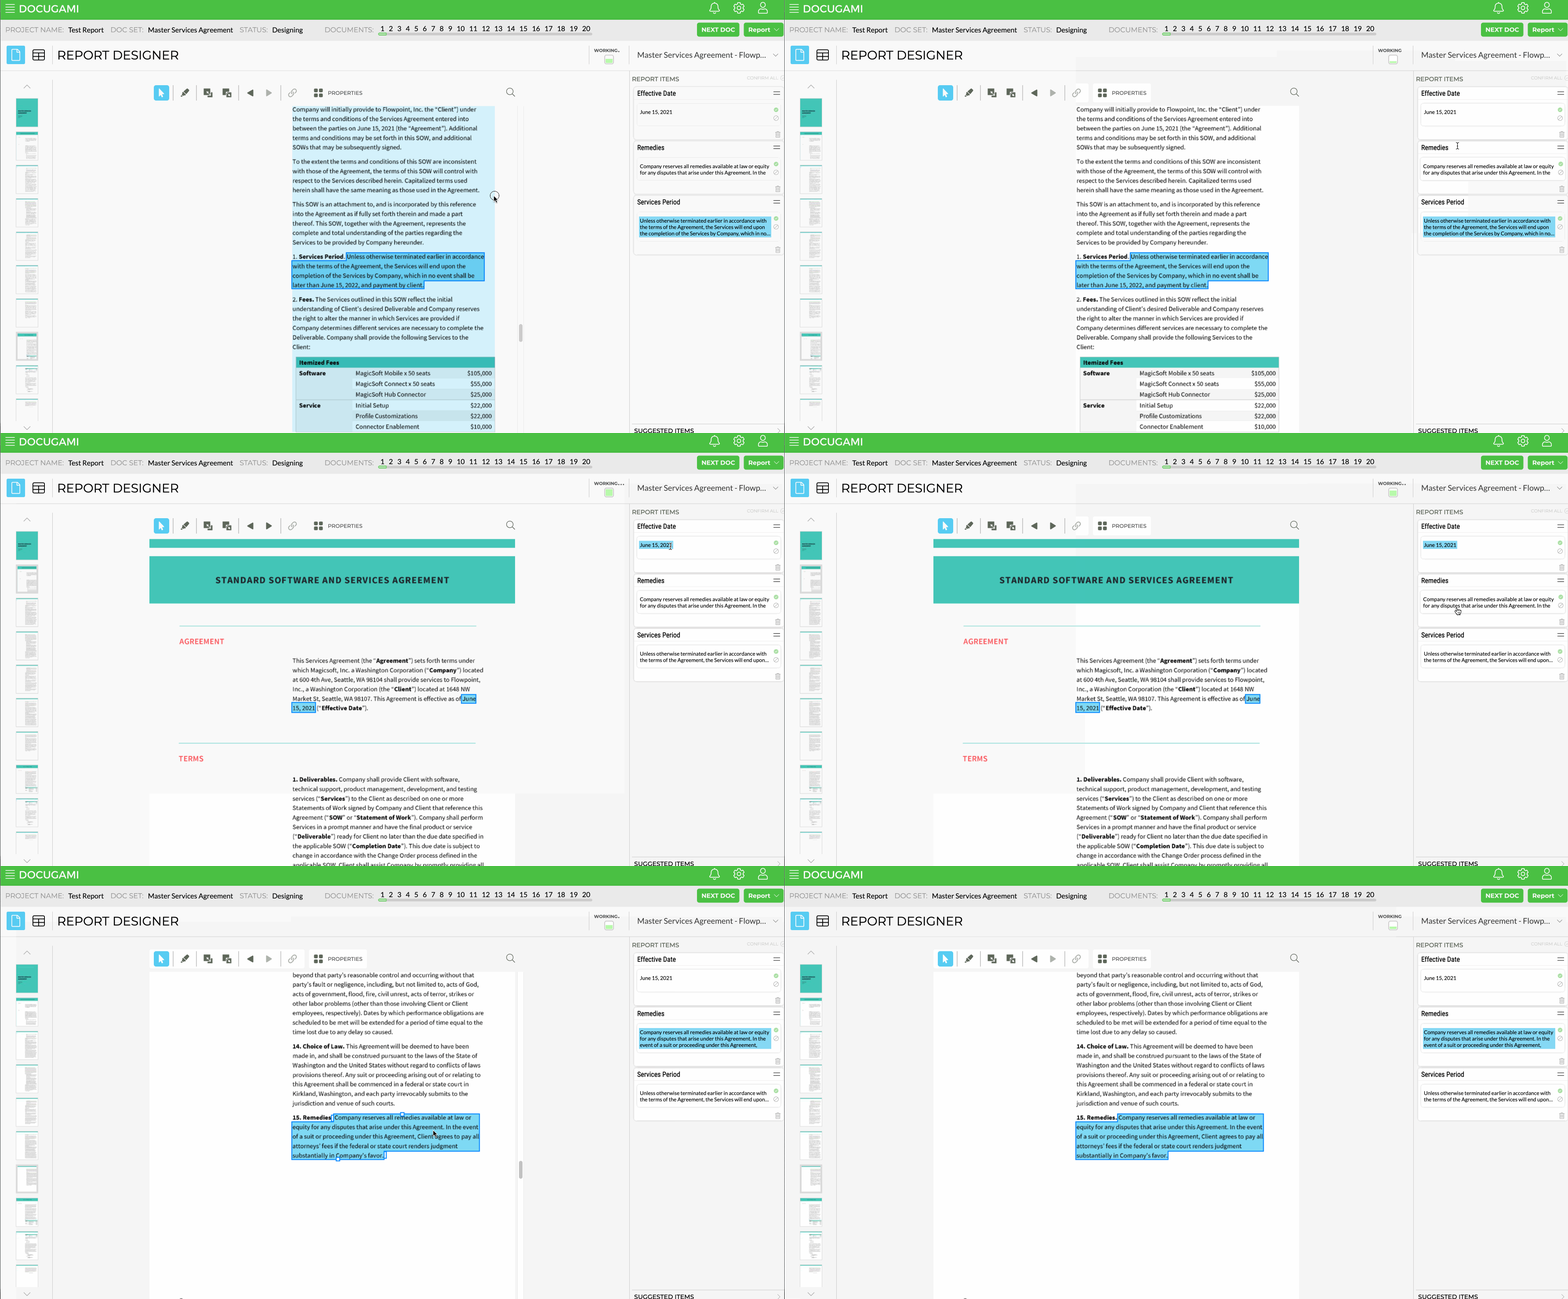
In addition, when you select a card in the report items list, it will navigate you to that chunk within the document:
EDITING CHUNKS:
As you work, you may need to adjust or even change certain characteristics of chunks you want to work with to suit your particular needs. As mentioned above, a chunk (or item) consists of a Tag and the Contents which both appear on a card when selected or added to the report items list. Either of these can be edited including:
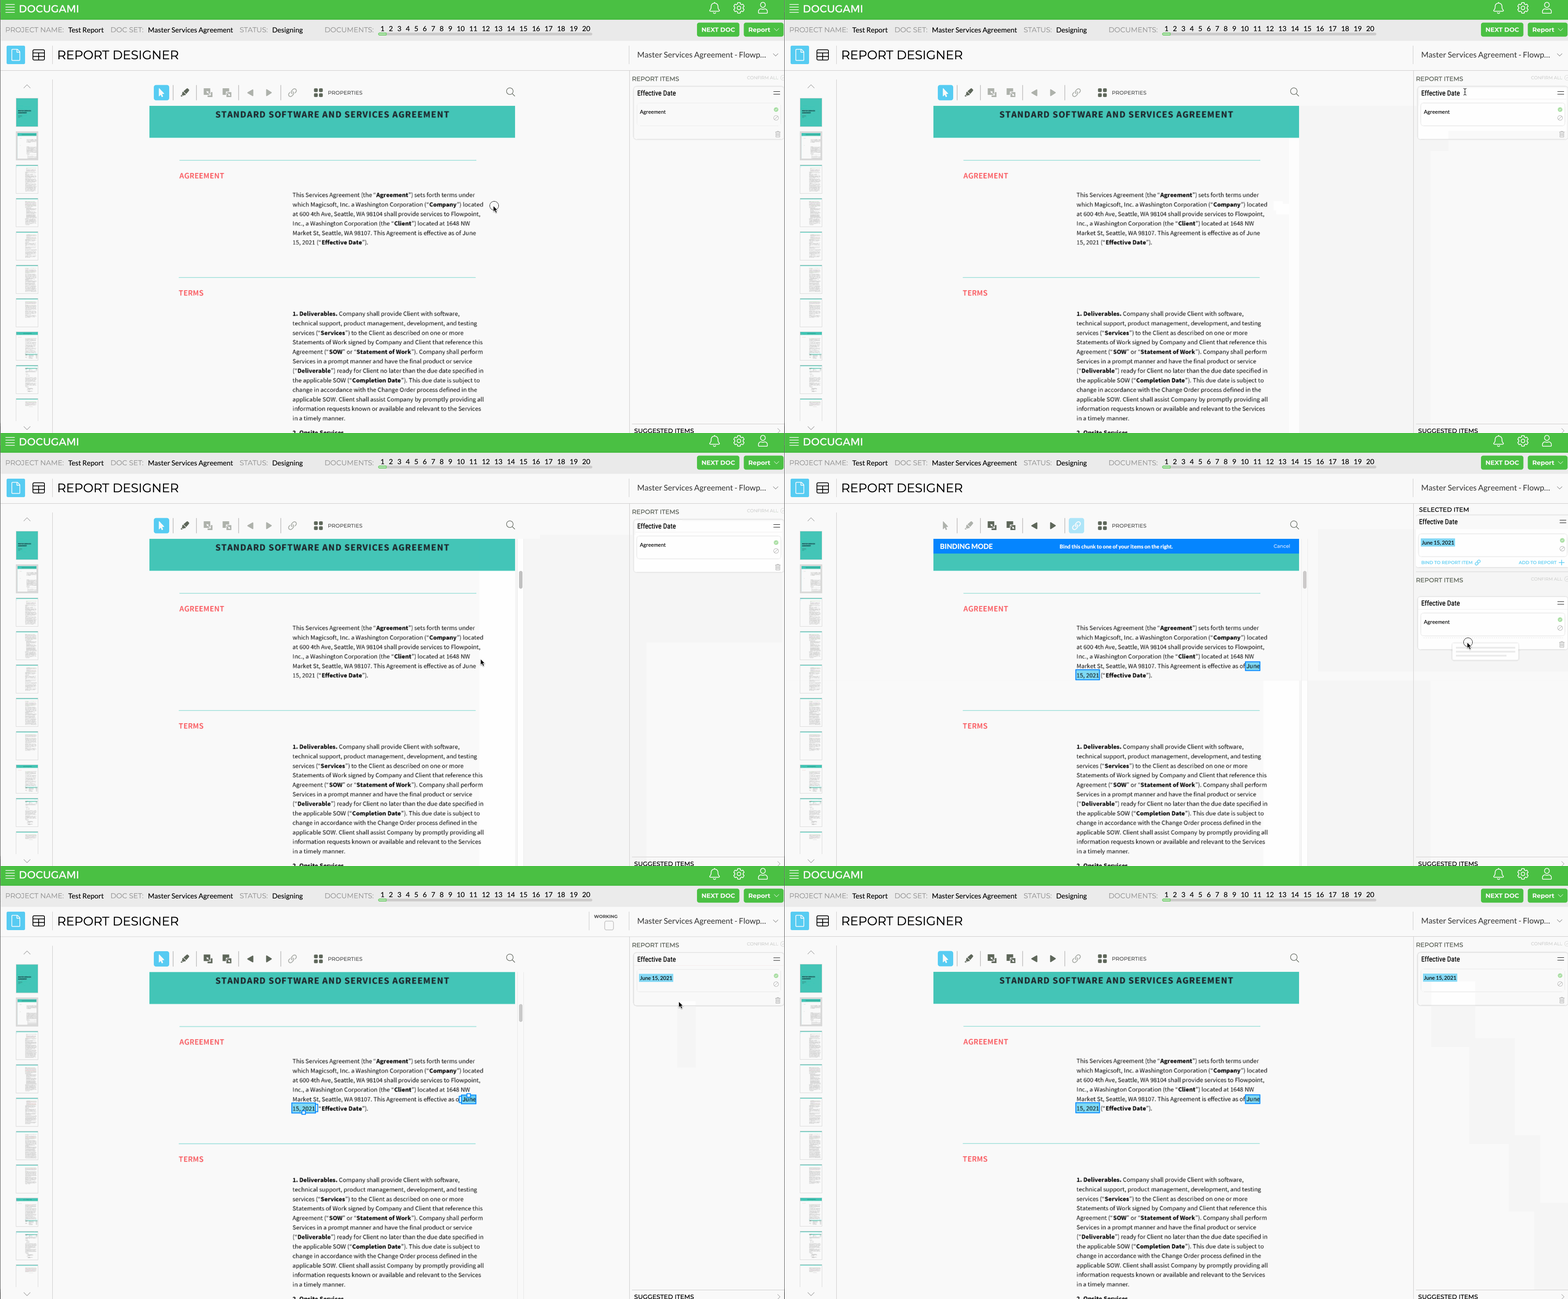
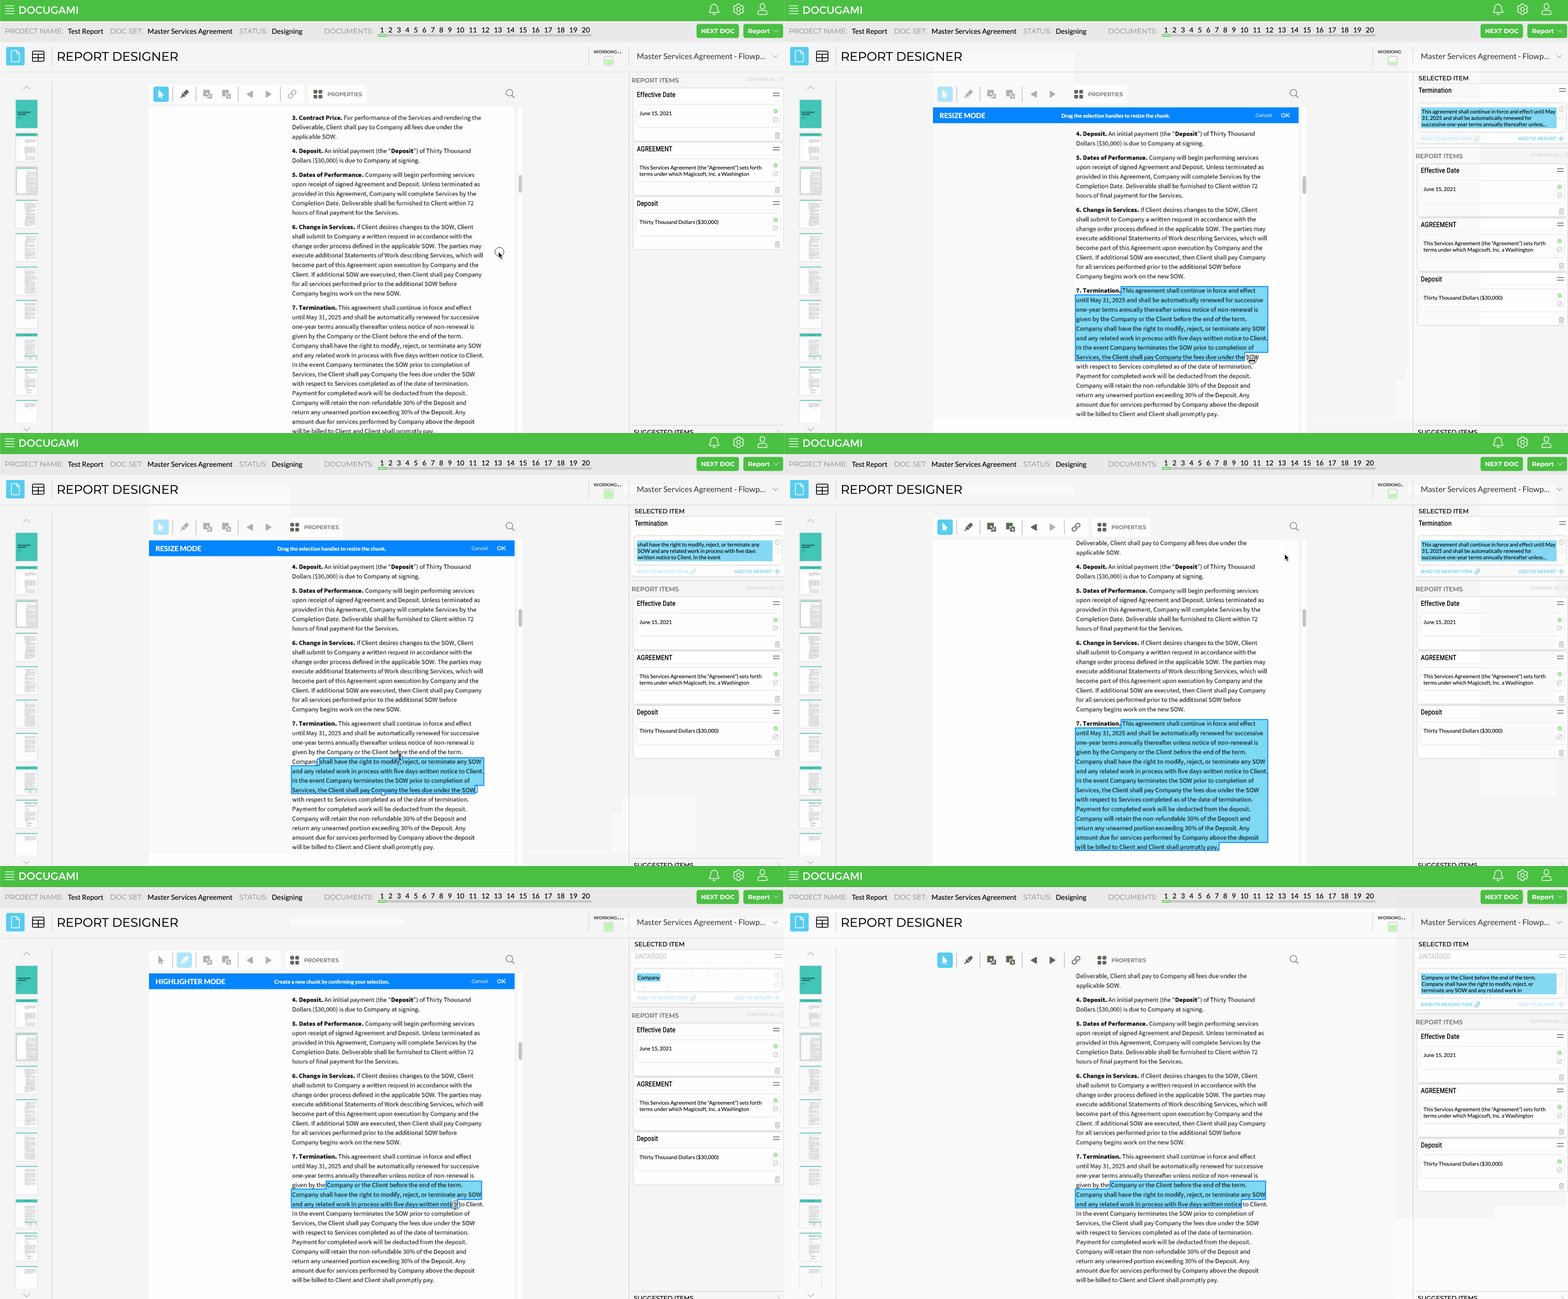
- Changing the bounds (or size) of the chunk you have selected. Do this when you want to keep the tag and the contents but need the contents to include more or less than what is selected.
- Changing the tag of the chunk you have selected. Do this when you want to keep the contents of the selection but the tag is missing or incorrect.
- Replacing the entire contents of the chunk. Do this when you want to keep the tag but the contents are completely different.
- Highlighting your own chunk. Do this when you want to disregard the selections Docugami is finding and create a chunk of any bounds that you want. (In most cases you will need to provide your own tag as well.)
Changing the bounds of a chunk:
After selecting a chunk, drag the handles on either end to resize the chunk. A blue bar will appear that says Resize Mode where you can confirm the change when complete by clicking OK or cancel if you don't wish to make the change.
Changing the tag of the chunk:
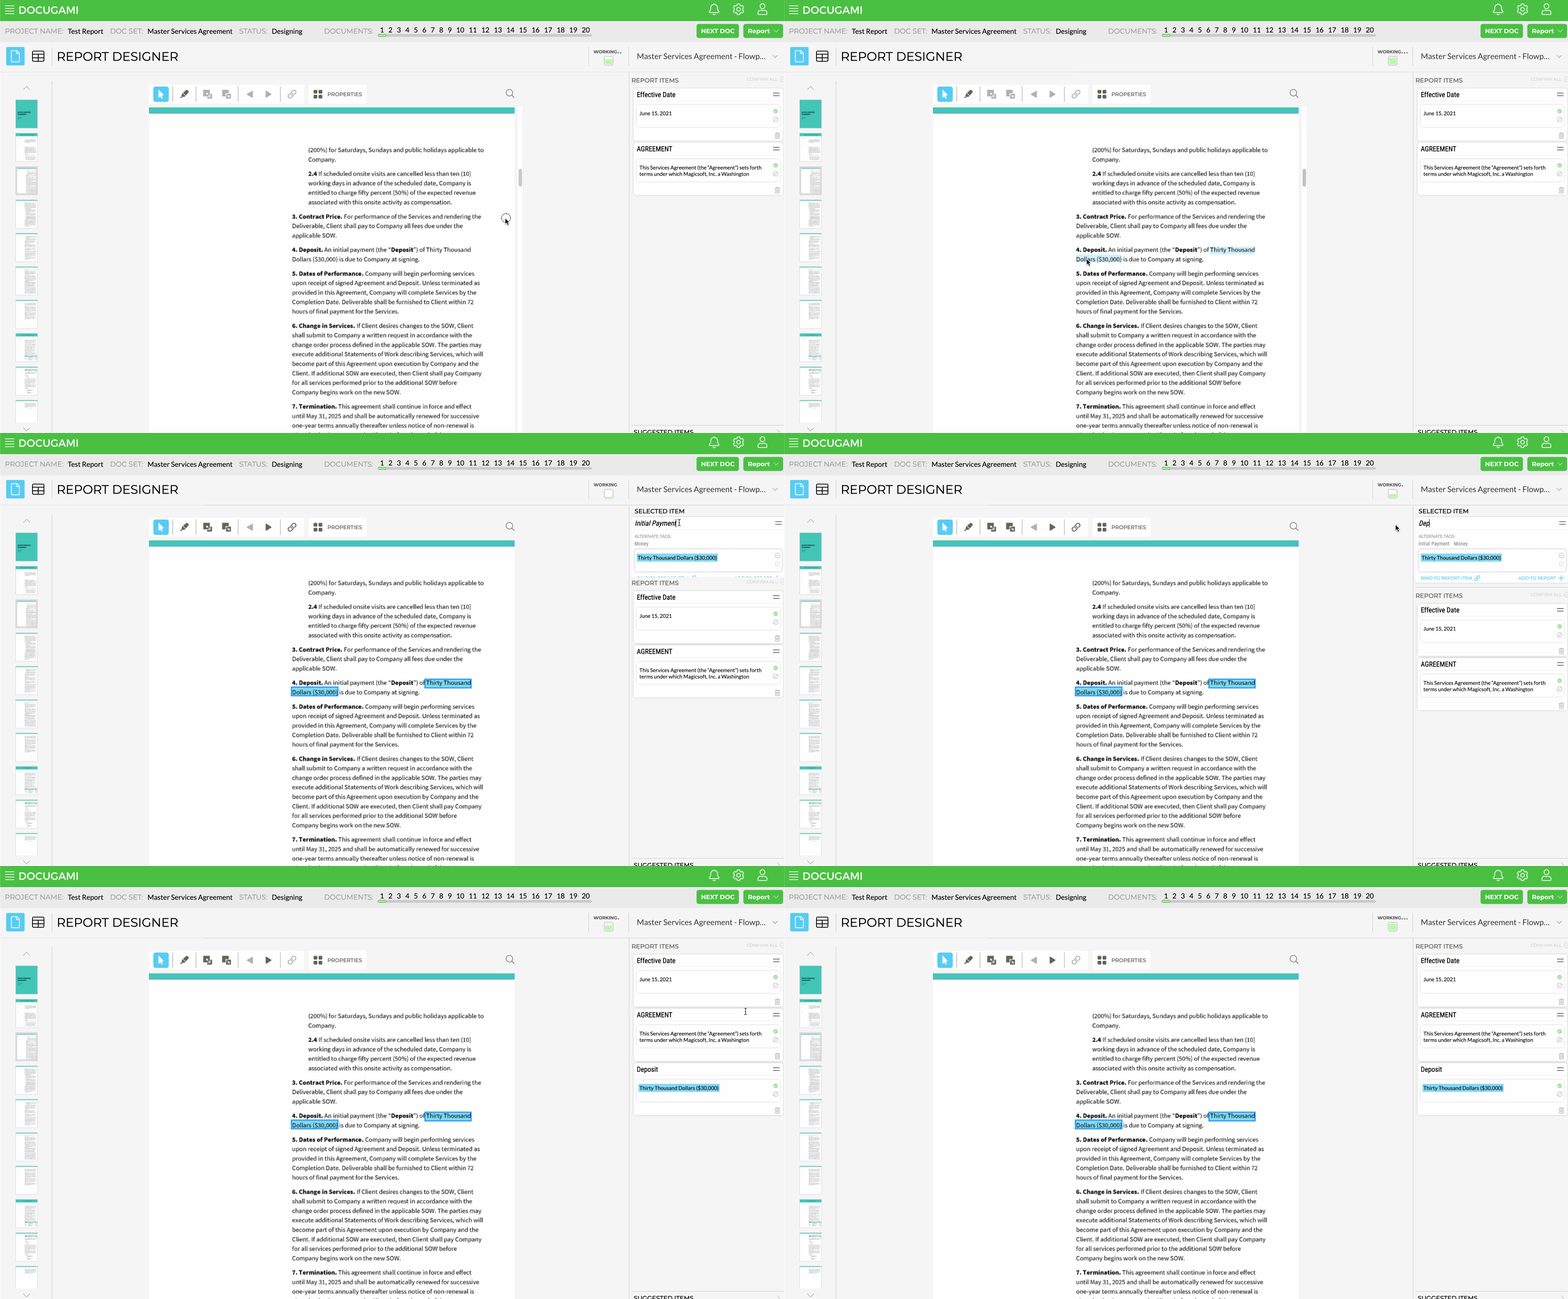
Clicking on the tag in the card of the selected item and you can then either edit it or completely retype it as needed. In addition, some suggested alternate tags will appear underneath it which you can choose if they are correct.
Replacing the entire contents of a chunk:
There are two ways to replace the entire contents of a chunk:
- On a chunk in the list click the Clear button. This will remove the contents and leave the content cardlet empty. You can then click on the empty cardlet and you will enter Linking Mode. Select the new chunk you wish to add to the card and click OK in the blue bar and that will now become the contents of that chunk.
- Alternatively, you can select any chunk in the document and drag and drop it directly over the content cardlet in any card. This will replace the contents of that cardlet with the new content. Be sure to drop it over the cardlet itself as dropping it below will instead create a repeat which is two or more chunks that belong under the same tag.
Highlighting your own chunk:
If you click on the highlighter in the toolbar at the top of the document canvas you will enter highlighter mode in which you can highlight any selection of content you wish. Once it is selected, click OK in the blue bar to accept the new chunk. If Docugami can assign a tag to it we will, otherwise it will be left untagged and you will need to type in your own tag.
CONTINUING TO BUILD YOUR REPORT:
Once you're familiar with selecting, adding, and editing chunks to your requirements, you'll be able to build out any report you need by creating a robust list of items you want to focus on for the selected doc set that will complete your report.
When you've finished reviewing and adding items from the first document you have a number of choices as to how to proceed:
- From this document, you can review the items you've added to the report list and reorder them by dragging and dropping them as needed. You can also Remove items if you wish using the trash can icon within the cardlet. Note that this will remove them from the report but they will still be recognized within the document itself.
- You can click the Next Doc button at the top of the project navigation bar to review it (or any of the document numbers in the document navigation bar) and from there you will see the items you've added to your report but they will be populated with any content Docugami found within THAT document. From here you can continue to add, reorder or remove items as needed. You will also start the confirmation process here which is covered in the next article, Reviewing and Completing Your Report.
- You can also click the table icon next to the Report Designer in the document canvas header and review all (or up to) 20 documents in table format which will show you all content found for all items you've selected. This is covered in more detail in the next article, Reviewing and Completing Your Report.
